Thursday, June 6, 2019

Steps for Making iReady Login


If you are student then you must know how important learning is for your life and you must improve your learning skills. Not only learning but reading skills must also be improved for better education. When you have iReady tests then you should not worry about these kinds of education terms. Using http //i-ready you can easily participate in iReady tests and these tests will improve your reading and learning skills.
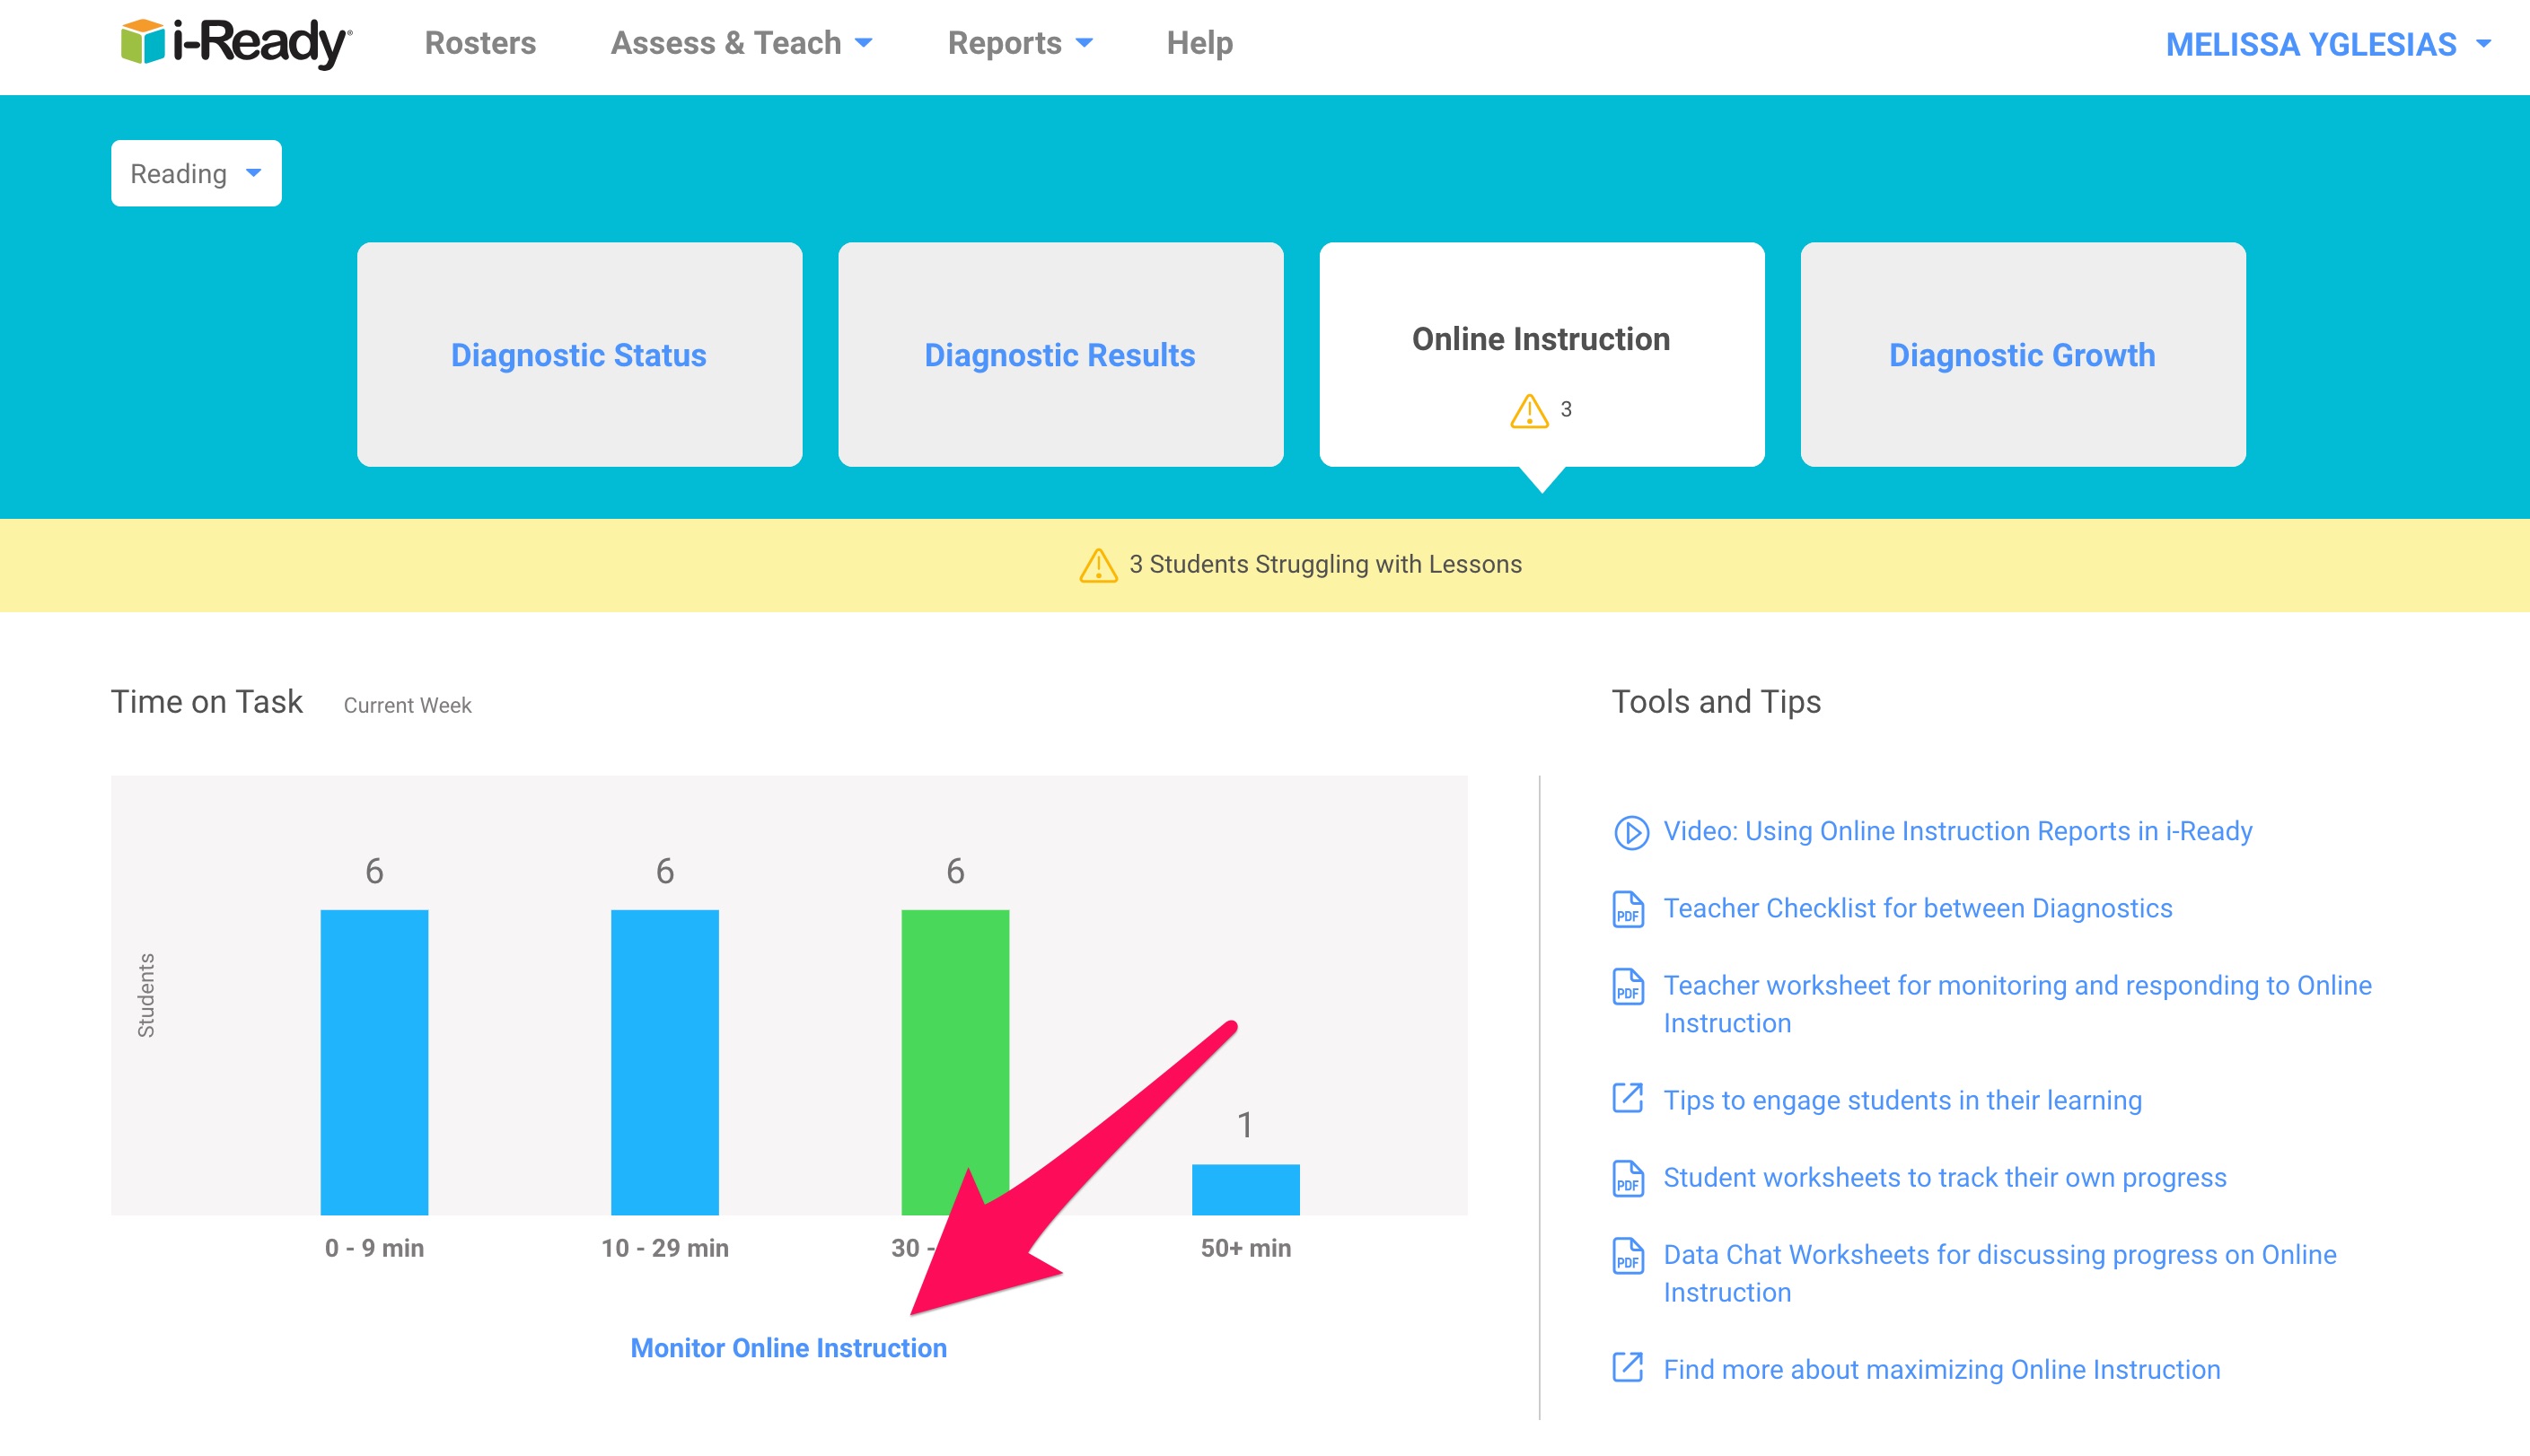
When you need to get these iReady tests, you will need to login iReady tests dashboard from your computer device. You can easily access iReady login from a computer system. We know that these steps are simple you will need proper guidance for making login for iReady tests. 
i-ready student login
Here are complete steps for accessing iReady from your computer
1.     Get a computer system because you will need this computer for accessing iReady login.
2.     Fill http //i-ready to the address bar. This is the default web address that you can use to make iReady login. You can’t replace or you can’t use any kind of IP address for accessing iReady login tests.
3.     After that iReady will ask for login user name and password. If you do not have iReady login then click on “Sign Up” button.benefits of having iready tests.
4.     Create new account for iReady and then you can verify your email.
5.     After that you can fill iReady login user name and password. 
iready sign in for students
 
These are steps for accessing iReady login from your computer. If you have only mobile device then you can’t use this mobile for your iReady login access. you wifi connections must be available in high speed only then you can access your tests.

Tenda F3 router device setup


Tenda wifi router devices are very strong devices and Tenda F3 devices are especially very advance router devices. This article is especially dedicated to Tenda F3 device configurations. If you have a new Tenda router device then you will need to access Tenda router ip login page for settings up your device. if you do not have CD for setting up your new device then this official login address will help your to setup your device. 
tenda a30 wifi extender setup
Complete Steps for Settings Up your Tenda F3 Device
1.     Wired connections will be required between your Tenda F3 router and computer system. If you connect your devices using wired connections, you can easily configure your device even if you lost the setup CD.
2.     Now open web browser at same computer device and fill Tenda router ip login IP. Do not know about login IP? Simply fill 192.168.0.1 IP address to your address bar and then click on “Enter” button.
3.     For user name you can use “admin” and for password you can either try “admin” or do not fill any thing in password field and hit the enter key.
4.     Click on “WLAN Settings” button.
tenda router ip login

5.     After that click on “Basic Settings” tab.
6.     You will get the setup button and then fill network type for your device, network name for your Tenda F3 device, either enable of disable SSID for your device.
7.     Choose the operating mode for your device. Tenda router devices can work with different operating modes so choose your desired operating mode.
These are steps for settings up new Tenda F3 wifi router device when you do not have the setup CD for your device. you can then remove the LAN cable for your device and place your router to new place.     
 

Update SmartThings Account to a Samsung Account home security starter


If you are using Samsung SamrtThings devices at your home then you can manage settings of your device using login SmartThings window. This is the official web portal from where you can change settings for your all your Samsung devices.
If you are new Samsung SamrtThings customer then you do not need to create a new account for Samsung but you can upgrade your existing SmartThings account to Samsung account. All steps are explained in this article but if you still need some help then you can contact Samsung team for help any time.setup samsung smartthings ADT home security starter kit
smartthings home security
If you Already Have SmartThings Account, Here are the Steps for you
1.     Install Samsung SamrtThings application to your mobile device.
2.     After that you can make access for your application using login user name and password. This will be possible only if you already have Samsung SamrtThings account so make sure that you are filling correct login user name and password.
3.     From main dashboard click on “Upgrade Now” option.
4.     Click on “Continue” button for the license window.
5.     You will need to verify your identity for accessing login SmartThings account and for that you will need to provide your login password once again.
6.     Click on “Continue” button once again.
7.     At the end click on “Done” button and your account will be upgraded.
smartthings web login
These steps will allow you to update your Samsung SmartThings account to direct Samsung account. Samsung team is always there to help you in case you are not getting these simple steps. If you find that your SmartThings account is having some problems then you can delete your existing account and create a new account from a fresh end.         

Setup a New Ezviz C2C Mini Camera Device


If you decide that you want to install Ezviz C2C mini camera for your home then this article will help you for sure. Installing and then making advance configurations for your Ezviz camera devices is not a big task but you will need a computer device and access for EZVIZ security camera login page and making these settings for your device. Change default password for Ezviz  C6T.
hikvision p2p cloud login
Setup a New Ezviz C2C Camera Device Manually
1.     First connect power adapter to your Ezviz mini camera device.
2.     Install Ezviz camera application to your mobile. You can find Ezviz camera application easily from the play store and iOS application store.
3.     When you install Ezviz application to your device successfully, you will need to add your camera to your application. For that, click on “+” button.
4.     Move your mobile device on your Ezviz C2C camera device. This is a bar code at the back side of your device so you have to scan that bar code.
ezviz security camera system
5.     Once your application detects the camera device, you can add this camera to your application. When an Ezviz camera device is added to your mobile device, you can easily access your camera settings from this mobile device easily.
6.     You can then install your camera device to any location at your home where you need more security. Make sure that surface where you are going to install your Ezviz camera is totally clean so that metal plate can stick on wall easily.
If you want, you can also insert memory card to your camera device. when you access EZVIZ security camera login page from your computer device, you can access the videos that are stored to Ezviz cloud account.